You may or may not like the way that Windows Server 2008R2 handles server backups, but it’s actually leaps and bounds easier to deal with than the old NT backup version. One big challenge that i’ve been faced with in working with Windows Server Backup (WSB) is that it seems to assume that you’re only going to ever use one external USB drive for backups. I like to rotate drives (and keep one in either off-site or in a fire-resistant safe) in case the building burns down and the attached backup hard drive goes up in flames along with the server.
The backup utility makes it terribly difficult to add a second drive into your already scheduled (and functioning) backup routine. You may get error messages when trying to run the scheduled backup onto a new external drive. These instructions assume that you already have a working WSB stategy in place and existing backups on your “first” external hard drive. Here’s how to get around the problem of adding a second external drive.
- Make sure that the existing USB external hard drive is labeled clearly so that you can tell it apart from the new one. Disconnect the existing drive and connect your new external and check that Windows recognizes it (it should show up as a new volume).
- Open command prompt as an Administrator and type the following command: wbadmin get disks > c:\disks.txt Then hit Enter.
Microsoft Windows [Version 6.1.7601]
Copyright (c) 2009 Microsoft Corporation. All rights reserved.C:\Users\Administrator>wbadmin get disks > c:\disks.txt
- Navigate to the c:\ drive and open the newly created disks.txt and read its content in Notepad.
wbadmin 1.0 – Backup command-line tool
(C) Copyright 2004 Microsoft Corp.Disk name: DELL PERC 6/i Adapter SCSI Disk Device
Disk number: 0
Disk identifier: {6ba2a08e-0000-0000-0000-000000000000}
Total space: 931.00 GB
Used space : 62.85 GB
Volumes: <not mounted>[RECOVERY],C:[OS],D:[DATAPART1]Disk name: WD My Passport 0748 USB Device
Disk number: 1
Disk identifier: {d3056456-0000-0000-0000-000000000000}
Total space: 1862.98 GB
Used space : 393.42 MB
Volumes: F:[My Passport]
- The GUID of the new disk is highlighted in red above. Copy the entire ID including the { } brackets on the ends. You will need this to tell Windows that you want to include this new drive in the backups.
- Go back into a command prompt (open a new one as an Administrator if you closed it) and enter the following command: wbadmin enable backup -addtarget:GUID So for example with this new drive above the complete command would look like this: wbadmin enable backup -addtarget:{d3056456-0000-0000-0000-000000000000}
- Note that there is NO space between -addtarget the colon : and the GUID.
The following output will be displayed in command prompt window:
wbadmin 1.0 – Backup command-line tool
(C) Copyright 2004 Microsoft Corp.The scheduled backup settings:
Bare metal recovery : Included
System state backup: Included
Volumes in backup: RECOVERY (2.99 GB),DATAPART1(D:),OS(C:)
Files excluded: None
Advanced settings: VSS Backup Option (FULL)
Location to store backup: server1 2014_01_10 11:34 DISK_01,WD My Passport 0748 U
SB Device
Times of day to run backup: 20:00
At this point, WBS will ask you if you want to do the following (answer Y for Yes)
Do you want to enable scheduled backups with the above settings?
[Y] Yes [N] No YDo you want to format and use WD My Passport 0748 USB Device (that includes volumes F:)
as the location to store scheduled backups?
[Y] Yes [N] No Y
After you answer Yes to these questions it will display some information regarding how you should label the new external drive, so that you can tell which one Windows is requesting should you need to restore data from it.
Label the backup disk as server1 2014_01_17 10:14 Disk_02.
This information will be used to identify this backup disk during a recovery.
The scheduled backup is enabled.
I recommend actually using the naming convention it suggests so that there is no confusion if you need to switch external drives to restore data.
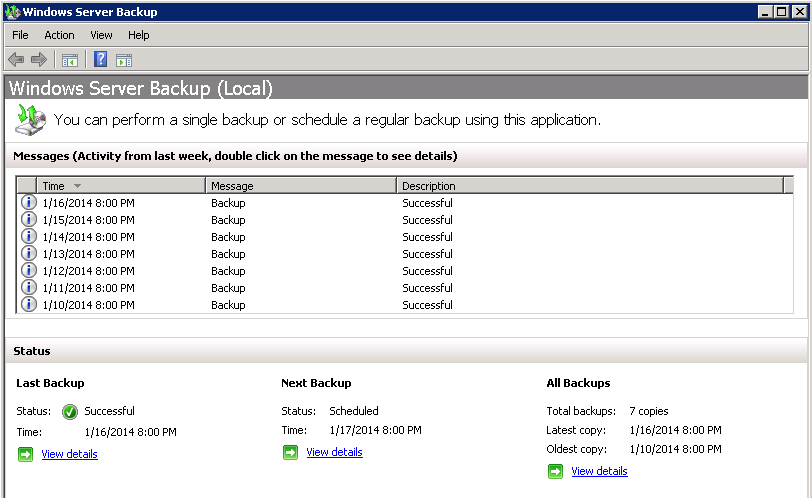
That should do it! It’s a good idea to test that the backup will actually start and run on the new drive. Run a manual backup (using your scheduled options) by opening Windows Server Backup, clicking on Action > Backup Once then selecting “Create a backup now using: Scheduled backup options”. You should see under where it says “Backup Destination” the label ID of the new external drive that is connected to the server!


Great tip, this is just what I was looking for! I have Server 2012 and the backup system hasn’t changed. Now that I’ve got both drives in use, how do I disconnect/reconnect them so I can rotate them?
Hi Doug- I apologize for the late reply. Hopefully you got this sorted out by now. If i remember correctly it was as easy as “safely ejecting” the USB hard drive that you wanted to rotate out and plugging in the next drive to use. Windows backup handled the rest when it came to backing up on the schedule. It’s been a long time since i’ve had to do this on physical servers, most backups we’re dealing with now are at the hypervisor level.